Triathlon Bike Training When You Can’t Ride Outside

How does training for the bike leg of triathlon occur when you can’t ride outside? There are more opportunities than you might imagine.

It’s Getting Cold Outside

I woke this morning to an outside temperature of 11°F (-12°C) and new snow. On top of this, the fitness centers are closed because of COVID-19 restrictions.

I don’t have, nor do I intend to purchase, a fat tire bike for riding in the snow.

Fat tire bikes with studded tires are preferred for a winter triathlon.

So, how can I maintain fitness for the bike leg of triathlons in which I hope to compete next spring?

There are plenty of options. While these may not be as good as going to a warm climate where I can ride outside, they still take away any excuses.

In this post, I will highlight the training I intend to use over the next several months to prepare for my next races.
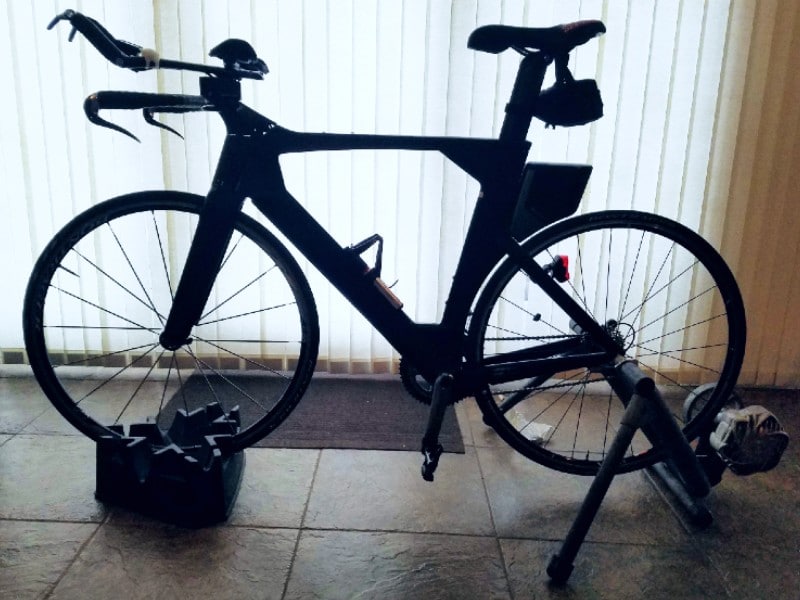
Bike Trainer

The most common way of developing bike fitness without riding outside is to use a trainer. In most cases, you connect your road bike or triathlon bike to one of many styles of trainer.

One benefit of using a trainer is that you develop and maintain a familiarity with the bike you will use for your next triathlon.

Trek SpeedConcept triathlon bike connected to a Saris CycleOps Fluid2 trainer for bike training when I can't ride on roads or trails.
Trek SpeedConcept on a Saris CycleOps Fluid2 trainer.

When the fitness centers re-open, I will also use their stationary bikes both for individual sessions and classes. I prefer the latter.

My trainer session, usually one hour, is divided into a few periods. Each segment is designed to work on a different goal. Breaking up the session also helps to prevent boredom. (Trainer sessions are also a great time to catchup on one of my favorite podcasts.)

A common one hour trainer session involves:

  • Warm up – 10 minutes at a moderate pace, 80-90 rpm cadence.
  • Single leg drill – 5 repetitions of 1 minute per leg at 80-90 rpm cadence – 10 minutes total. (NOTE: This may not be advisable for some trainers, but is for the Saris CycleOps Fluid2.)
  • Intervals – 5 repetitions of 4 minutes in the highest gear in which I can maintain 60 rpm cadence followed by 2 minutes easy at 80-90 rpm cadence – 30 minutes total.
  • Cool down – 10 minutes at moderate pace, 80-90 rpm cadence.

You can find many workouts to match your current fitness level and specific goals on-line or in books like “The Big Book of Bicycling” by Emily Furia and the Editors of Bicycling.

Advantages

  • Safer than riding in traffic or in the aero position on winding trails shared with pedestrians, especially in the winter but really any time of the year.
  • Efficient – A rule of thumb is that one hour on a trainer represents two hours riding on the road because you aren’t (or shouldn’t be) coasting on the trainer.
  • Some training, such as single leg drills, are best done on a trainer.
  • Accessible within your house or apartment.

Disadvantages

  • Static trainers don’t help to develop stability and coordination or bike handling skills.
  • Can be terribly boring. Some call these sessions the ‘purgatory’ of bike training.

Strength and Endurance Exercises

Strength training throughout the year should be a regular part of a triathlete’s training. I recommend Mark Allen’s program, especially if your fitness center is open.

However, if it isn’t or you want to give extra attention to strength training for the bike leg, look at the TrainingPeaks routine.

Except for the row, the exercises that involve weights can be done with homemade alternatives such as a weighted backpack (kettlebell) and plastic jugs filled with water (8 pounds per gallon/1 kilogram per liter) or other materials (beans, sand, coins) depending on the desired weight.

Advantages

  • Allows you to focus on strengthening the weakest areas for the greatest improvement.
  • Can be done from the convenience of home or at a fitness center.

Disadvantages

  • The only disadvantage of which I am aware is that doing exercises without the benefit of a coach or training partner can lead to less than optimal results because of poor form.

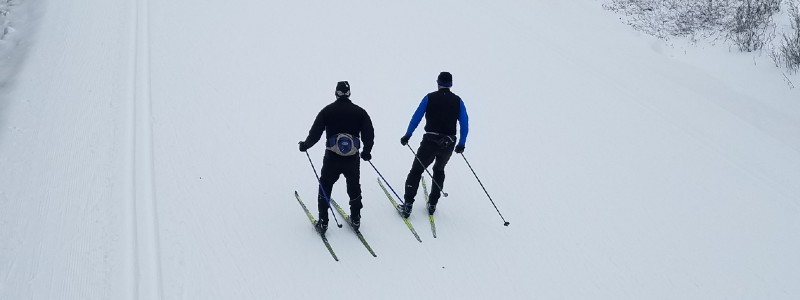
Cross-Country Skiing

cross-country skiing is effective cross training for cycling
Cross-country skiing is a great way to cross train for cycling while enjoying fresh air and sun. It also helps prepare for a winter triathlon involving running, biking, and skiing.

In the northern USA state where I live, Nordic skiing, or cross-country skiing, and ice skating are popular winter sports. I enjoy both skiing and skating, though have not skied for over 20 years.

Nearly every county park in our area has groomed cross-country ski trails. Larger parks also rent ski equipment (skis, boots, and poles) and offer group and personalized instruction.

Cross-country skiing produces endurance and strength for both the large muscles and the smaller muscles that support the larger muscles. Brett Sutton, coach of world champion triathletes, calls cross-country skiing “the hardest overall body workout out there”.

Downhill skiing is also good for building lower body and core muscle strength and for improving balance and coordination. However, downhill skiing does not yield the endurance benefits of cross-country skiing. Also, it much less accessible and more expensive than cross-country skiing.

“Nordic skiing, or cross-country skiing, is also great cross training for cycling. While downhill skiing brings more strength gains than endurance, Nordic skiing brings more endurance gains along with the added development of supporting muscles.”

ILoveBicycling.com

Classical vs. Skate Skiing

Today, there are two types of cross-country skiing – classical and skate-skiing.

Classical cross-country skiing involves a kick and glide motion. Skis remain parallel to each other, unless ‘snow plowing’. The classical cross-country ski courses are characterized by the parallel ruts in which the skis glide.

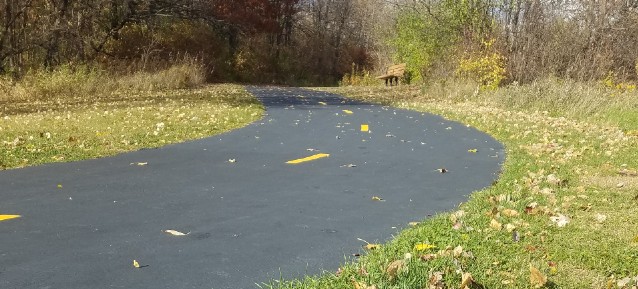
Cross-country skiing can also be done on fresh snow, that is, without a groomed trail. Most snow covered walking or bike paths are a candidate for classical skiing.

In contrast, the side-to-side motion in skate-skiing is like that of ice skating. Therefore, it uses muscles even more similar to those for pedaling.

One disadvantage of skate-skiing is that it requires a groomed trail. This makes it less flexible in where it can be done. Skate-skiing is also more difficult because it requires greater balance and coordination. However, it is faster than classical skiing.

Advantages

  • Provides both endurance and strength benefits.
  • Accessible – classical cross-country skiing can be done at your nearest park, golf course, or snow-covered lake. (Be sure the golf course is open for skiing and the ice on the lake is thick enough.)
  • Relatively inexpensive, especially compared to downhill skiing.
  • Gets you outside, into the fresh air and, hopefully, the sun. Think Vitamin D.

Disadvantages

  • While cross-country skiing uses many of the same muscle groups as cycling, you may put more strain on certain muscles and tendons than when biking. To avoid injury, start slow and increase distance gradually.
  • A beginning skier is likely to fall. Expect it and try to relax as you fall to avoid significant injury.

Note

From the reading I did in preparing this post, I have taken the first steps in scheduling cross-country ski lessons at a nearby county park. I am hoping to learn to skate-ski.

Ice Skating

Most cities in the northern climates, large or small, have an outdoor ice skating rink. Elsewhere, given the popularity of ice hockey, many of the more populated areas in the USA and Canada have indoor ice arenas.

Ice skating, like skate-skiing, is great for working smaller muscles that are often overlooked but valuable for biking performance. It is also great for improving balance, flexibility, and coordination.

Ice skating is an effective way to strengthen small muscles often overlooked in strength training yet important for cycling performance.

Advantages

  • Great for strengthening leg and abdominal muscles. Skating is also reported to increase the flexibility of more joints than cycling and running by strengthening ligaments and connective tissue around these.
  • Low impact, unless you jump or spin (or fall often).
  • Relatively inexpensive, often free (after purchasing or renting skates) if you live in a climate where outside temperatures are consistently below freezing. Even small towns typically have an outdoor ice skating rink open to the public.
  • Gets you outside, into the fresh air.

Disadvantages

  • Ice skating requires good ankle strength (which you probably have as a runner). However, you may put more strain on some muscles and tendons of the feet and ankles than when biking. As with any new sport, start slowly and increase gradually.
  • Expect to fall, especially as you begin. At least that’s my experience. However, since I am usually bundled up for the cold, I have seldom been injured and then only with a bump or bruise to my ego.

No Excuses!

None of us has an excuse related to weather for not continuing to train for the bike leg of a triathlon throughout the winter. Even if I stay in the north part of the USA, there are plenty of opportunities inside and outside my house.

Some may actually be better than riding outside.

How Do You Train for Triathlon Biking When You Can’t Ride Outside?

How do you continue training for the bike when you cannot ride outside? Share your comments below.

Learning to Swim for Triathlon – Breathing Correctly

‘Breathing correctly while swimming is a pre-requisite for a relaxed and efficient swim stroke. It’s also the foundation of a confident triathlon swimmer.

Learning to Swim for Triathlon

Since I learned to swim around the time I began grade school, I was initially surprised to hear about the many over 50 who have never learned to swim. However, it is truly never too late to learn to swim. In fact, you should learn to swim for all its benefits.

Most who struggle with learning to swim, including my mother and my aunt, swear they were simply not ‘made’ to swim. When pressed on this, they admitted their difficulty learning to swim was rooted in their inability to ‘catch’ their breath.

The literature on swim training is full of support for the premise that breathing correctly during the swim is the first and most fundamental skill to master on the road to becoming a confident swimmer. It is only after we have developed a means of taking in oxygen needed to fuel our muscles during swimming that we can work on other parts of the technique.

The confidence that comes from relaxed breathing during the swim will also help us deal more effectively with the unknowns that can and often do occur during a triathlon.

Why Breathing While Swimming is Challenging?

The swim strokes commonly used in a triathlon require breathing with our face in the water a majority of the time. This is certainly true of the fastest and most popular stroke for the triathlon swim, the front crawl, sometimes referred to as freestyle.

For this stroke, our face, nose, and mouth will be in the water during most of the stroke. This is especially true if we maintain a proper body position. With a correct position, our head will be in line with our spine in order to maintain balance in the stroke.

Even the breaststroke, used by some triathletes, involves the face being underwater a good deal of the time.

While it is possible to swim with our head out of the water, at least for shorter swims, this body position leads to extra drag as our legs drop in the water. It can also lead to fatigue of the neck muscles. Greater fatigue during the swim will affect the other legs of the triathlon.

Controlled Breathing Starts With Base Fitness

The more relaxed our breathing is during the swim, the more we can focus on the stroke and on maintaining control of body position in the water.

There are two principal contributors to controlled breathing: (1) fitness and (2) breathing technique in the water.

Let me start with the first one – fitness.

We all know that when starting to exercise after being away from it for a while, our breathing becomes labored and our heart rate becomes elevated more quickly than when our fitness increases. Our bodies are not as efficient in using oxygen as they will be when we become more fit.

It is well documented that the amount of power we generate at a given heart rate increases as we become more fit.

My own experience has been that when I resume swimming after a period of low activity (low aerobic fitness), my heart rate will often spike when I push myself to swim faster.

When that happens, I am forced to slow or even stop momentarily. This doesn’t give me confidence as a swimmer.

For this reason, I suggest that before starting to swim, you develop a base level of fitness through combined walking and running or other aerobic exercise, such as water aerobics, using the approach described in this post on building a base level of fitness.

What Makes for Proper Breathing During the Swim

We rarely pay attention to our breathing when we are on land. We may be more aware of our breathing when running, biking, or performing other strenuous activities. However, even if conscious of our breathing, we notice it is a more or less continuous process. We are continually either inhaling or exhaling.

Why then do people hold their breath while swimming, expecting to almost instantaneously exhale and inhale? It doesn’t work. And breathing incorrectly becomes even more apparent as we swim for a short while and our body’s demand for oxygen ramps up.

When learning to swim, breathing must be conscious. It must involve proper amounts of inhaling and exhaling. The challenge is that the ratio of inhaling and exhaling is not natural. Neither is the environment. That’s why we need to learn to breathe in the water and to do so with ease.

For the rest of this post, I will assume that you will learn to swim using the forward crawl stroke, the one most commonly used for the triathlon swim.

Inhale quickly through the mouth

Inhaling during the swim stroke occupies a small portion of the breath. Tilting our head to one side periodically so that our mouth is out of the water gives us time to take a quick breath of air. Even if a little water gets into our mouth during this process, it is not a problem since our mouths are designed for taking in water as well as air.

inhaling during a front crawl
Inhaling during the front crawl stroke occurs as the head rotates to one side, yet remains partly underwater. Note the wave in front of the head and the depression near the mouth.

Exhale through the mouth and nose until ready to inhale once again

Exhaling is where most of the difficulty occurs. Unless you have exhaled all or nearly all the contents of your lungs, the amount of oxygen you can take in when inhaling will be limited. For this reason, exhaling through both the mouth and nose should begin immediately upon completing the inhale portion. Continue exhaling until beginning to inhale once again.

Remember to exhale through both the mouth AND nose. Most of the exhaled air should, however, pass through the mouth.

Exhaling through the nose alone has two limitations. First, it is nearly impossible to exhale an adequate amount of carbon-dioxide rich air during the short period of a single stroke.

Secondly, forcing as much air out of the nose as possible forces germ-laden water droplets from the throat into the nasal passage and other portions of the sinuses and ears. Water trapped in these parts of the body can be irritating, even unhealthy.

Triathlon Tip: Do you struggle with water in your nose during swimming? According to USAT officials, it is legal to use nose plugs and even a face mask during a triathlon swim. For more information, check out this related post: Product Review: Nose Clip for Triathlon Swim Training.

Never hold your breath

If you are having difficulty breathing while learning to swim, stop and observe. Is there any time in the stroke during which you hold your breath? Never hold your breath! Always be either inhaling (while your mouth is out of the water) or exhaling.

Learning to Breathe Correctly While Swimming

I hope that I have convinced every new swimmer preparing for a triathlon to begin their swim training by learning to breathe properly.

At this stage, it is critical that you keep yourself safe by avoiding water too deep to stand in. With this ‘safety first’ goal in mind, here are two options for developing your breathing technique.

On Your Own – With a Friend Who Can Swim

While getting lessons from a professional swimming instructor is best, you may not have access to one because of where you live. Or, your fitness or community center may not offer lessons.

You can develop confidence in breathing during the swim on your own. However, at this stage in your swimming development, don’t go into the pool without an observer (lifeguard or friend who remains on the deck watching you).

First, practice breathing while standing in the water. Put on your swimming goggles (and nose and earplugs if needed). Put your face in the water and exhale simultaneously through your mouth and, if not using a nose plug, your nose.

When you have exhaled nearly all the air, roll your head to one side until your mouth is just out of the water. Quickly take a breath, roll your head back into the water, and begin exhaling. Repeat this process several times.

For this exercise, you can rotate to the side on which you are most comfortable. However, after a while, you will want to become comfortable breathing on either side. You will understand later, especially during an open water swim on a sunny or windy day, why this additional flexibility in your swim stroke is valuable.

Note that breathing while moving through the water will be easier than when standing still. As the picture above shows, water flows around the body as we move through it, creating a depression around our face. As a result, you can take a breath with one eye (goggle) underwater.

Next, grab a kickboard

Once comfortable with the rhythm while standing, you can grab a kickboard. Hold it with your arms extended in front of you. Extend your body in the water while maintaining a straight spine. Keep your butt, legs, and feet near the top of the water.

Kick along the length of the pool practicing breathing – inhaling and exhaling. Continue to exhale until your mouth is out of the water enough to grab a quick breath.

Try to avoid lifting your head when rotating it to take a breath. Be aware that the kickboard will keep your arms and head higher in the water than when swimming without it.

Once you are comfortable kicking and breathing, you can hold the kickboard with one hand, alternating hands as you use the other to pull through the water.

These techniques are demonstrated in this video.

Join an Adult Swim Class at the YMCA or Your Fitness or Community Center

I learned to swim well when I was young. However, the quality of my swim stroke and my confidence as a swimmer jumped to a new level through the help of one of my kid’s YMCA swim coaches. He had watched me swimming laps and gave me a couple of pointers related to breathing that I have included above. These simple tweaks to my breathing changed my swim.

Safety First – Save the Open Water for Later

There are several advantages of starting to swim in a pool.

First, and probably most important, is that you can control the depth of water you are in. Many pools have a depth in which you can safely stand. If there are deeper sections, it is easy to see where the depth increases to avoid these.

Many pools also have lane dividers, ropes with or without discs, running between individual lanes. You can hold on to these if it becomes necessary to stop in an area too deep for standing.

These favorable conditions do not typically exist in open water. In most cases, it will be difficult to see the bottom and gauge the depth of the open water.

Related post: Triathlon Swim–How Does a Pool Swim Differ from Open Water?

Where Do You Go From Here in Learning to Swim for Triathlon?

As with learning most new skills, patience is a virtue. Keep working to become comfortable breathing with your face in the water.

Once you have achieved this, you are ready to move on. In the next phase, you will develop your form in each of the parts of the stroke. This will set the stage for more effective training and further confidence-building increases in speed and distance.

Leave Your Questions and Comments Below

Leave your questions about breathing while swimming in the Comments below. To the experienced swimmers and swim coaches reading this post, what would you add to my comments?

Comments: Please note that I review all comments before they are posted. You will be notified by email when your comment is approved. Even if you do not submit a comment, you may subscribe to be notified when a comment is published.

A Special Birthday Present – Juha Makitalo’s Story

Have you asked yourself if you should do your first full Ironman triathlon, even though you are age 50 or over? Juha Makitalo did and decided to go for it. This post contains his story, including the main lessons he learned along the way.

Introduction

During the late 2000’s and early 2010’s, Juha Makitalo and I worked in a multinational manufacturing company. We learned of our mutual love for triathlon and continued to share our progress after my retirement from the company.

Recently, Juha wrote to tell me he had completed Ironman Tallinn in Estonia as part of his 50th birthday challenge. I asked him to share his story and the lessons he had learned from the experience with the Senior Triathletes’ community.

Juha graciously agreed. However, since there is an eight hour time difference between our homes and Juha is working as CEO of the Finnish automation manufacturer Pemamek, we decided to conduct the interview by e-mail. This post is based on our exchanges.

How did you get started in triathlon?

Juha – When I was young, I used to race in middle and longer distance running and in cross-country skiing. In 1986, I did my first triathlon, a small village race. This race was a little shorter than an Olympic distance. Like many first time triathletes, I used a normal every-day bike, not a racing bike.

Between 1986 and 1994, I participated in 5 to 10 sprint and Olympic distance races each year for a total of 40 to 50 races. My best year was 1991 when I set a personal record of 2 hours 3 minutes in an Olympic distance. race.

What motivated you to complete an Ironman race? 

Juha –When I was younger and racing shorter distances, I remember having admired guys like Mark Allen and Pauli Kiuru from Finland who raced the Ironman Kona. I remember thinking that one day I wanted to do an Ironman and also maybe to go to Kona for a race.

In the mid-1990s, I met my wife, finished the university, and started working. My training was reduced, to almost zero.

After a few years, I started to train again, mostly to lose some weight I had gained. In 2016 and 2017, I ran a marathon in Stockholm, finishing in a little over 4 hours.

In 2017, a manager of one of our company’s suppliers challenged me to participate in the first Ironman event in Finland, Lahti Ironman 70.3 at the end June 2018.

That race went well for me; I finished in about 5 hours 30 minutes. The next June, I participated again in the Lahti Ironman 70.3. In August, I completed Challenge Turku 70.3. Lahti took 5 hours 40 minutes this time and Turku took 5 hours 20 minutes. I also completed two sprint distance races.

Several people encouraged me to go for a full Ironman (Ironman 140.6). I initially felt it was too much for me. However, I finally decided to try. For a 50th birthday present, I gave myself a registration in Ironman Copenhagen 2020.

Exiting Lake Harku at the 2020 Tallin, Estonia Ironman Triathlon – with a smile.

Related post: What If I Want to Do An Ironman Triathlon? – Tom Lipp’s Story

Why the Tallinn, Estonia triathlon?

Juha – I had registered and paid for Ironman Copenhagen in August. However, because of COVID-19, the Copenhagen race was postponed to 2021.

I had trained quite intensively and felt disappointed that I would not have the opportunity to test my condition. The only remaining major full distance race close to Finland was Ironman Tallinn. After long consideration, I decided to compete in the Tallin race.

How did COVID-19 impact your triathlon plans?

Juha – As I mentioned previously, I had originally planned to compete in Ironman Copenhagen. The race was postponed by one year so I chose the Tallinn race instead. That was the negative part.

However, I must admit that COVID-19 had a positive effect on my training.

During a normal year, I travel quite a lot for work. Now, with COVID-19, travel was minimized. That helped me to have more time for training.

Also, travelling normally means shorter nights and less sleep. With less travelling, I was able to get more rest. Recovery from the increased training was clearly better.

Training

How did you train for the 70.3 distance?

Juha – For the first two years for Lahti Ironman 70.3 races, I trained without a coach. I had already been training for running, so I just added some swimming and biking. I continued also to go to ice hockey training one to two times per week. During the winter, I also did some cross-country skiing.

My target was to train about 6 to 7 hours per week with at least one swim and one bike session per week during winter. Then, in the spring, I planned to add more hours of training per week.

Actually, my average week involved about 5 hours total training. During the winter, it was a little less. In the summertime, I trained a little more.

How about training to complete your first full Ironman at age 50?

Juha – After deciding to compete in the full Ironman, I was convinced that I would not be prepared to complete the full distance without a coach. I was sure I needed both higher quantity and quality training. Initially, I looked for online training programs since I live in a small town where it would not be possible to participate in training groups.

One of my friends recommended Kai Söderdahl who owns and runs Aqua Plus Triathlon sports club. He creates different level training programs for his triathletes.

Söderdahl is a long-term, successful triathlete with two podium finishes at the Kona world championship. In 2019, he was also North American Champion in his age group. Since I also knew him from the early nineties, it was easy to choose him.

Coach Kai makes training programs available online through the TrainingPeaks application. I would sync my actual data from my Polar sports watch to the application. This was easy from a technical point of view.

After planning, it was time to train

Juha – The actual training was not as easy, however. Coach Kai’s plan on TrainingPeaks called for 10 to 12 hours of training per week. I was only able to commit to 7 to 10 hours or 20 to 25% less than what the plan called for.

Autumn did not start too well. At the end of October, I had a long work trip to the US with a lot of local travel. After returning back to Finland, I had the flu followed by a bout with bronchitis. I missed all of the November training, finally starting at the beginning of December.

With this delay, the focus was purely on swimming, biking, and running and some strength training at the gym. I trained between 8 and 10 hours per week during the wintertime.

Soon, I started to feel quite tired from training. The early part of year involved a constant balancing of training and resting. Of course, these were also balanced with work.

Finally, during the spring, my training started to feel better. I was able to do more than the 7 to 10 hours. Eventually, I worked up to the 10 to 12 hours of the on-line program. By late spring/early summer, I felt that my condition had improved a lot.

I owe a lot of this progress to Coach Kai Söderdahl’s experience. He knows how to balance training. He included a mix of low- and high-intensity training within a week. Over the long term, he mixed heavier and lighter weeks.

My training included much more swimming and intervals than I had done before. I spent a lot more hours with low heart rate training balanced with some very intense short sprints or intervals.

Racing

What did you find most memorable during the race?

Juha – First, considering the location of Tallinn, an early September race day made for questionable weather. While it was quite windy on race day, the temperature at the beginning of the race was comfortable at 15 °C (59 °F). Only later in the day did it begin to rain and cool down, becoming chilly.

Swim

While Tallinn is located on the Baltic Sea, the swim was in Lake Harku, a small freshwater lake in the city. This was better for me since I am not used to swimming in saltwater. The wind created some small waves, though these had little effect.

I started the swim in the last group. I had decided before the race to swim a relaxed pace to save energy for the bike and run.

The only problem during the swim occurred when a fellow competitor swam on my legs, hitting my calf. This caused my calf to cramp. I stopped for a moment to stretch the muscle. Fortunately, the cramp left and never reappeared.

Bike

The bike leg consisted of two laps of a mostly flat course with a few small rolling hills. This course was good for me since it is much like that around my home. Since the area near my home is also flat, I never had opportunity to get much climb training.

I managed to keep good control of my power output. I felt good throughout the bike leg which was also the first time I rode a full 180 km (112 miles).

The trickiest part of the course was at the end of the first loop and beginning of the second which went through the center of Tallinn. Here, there were many turns and crossroads. There was also about 1 km on a wooden bridge.

Juha Makitalo during the bike leg of his first full Ironman triathlon at age 50.
Juha’s first-ever 180 km (112 mile) bike ride took place during Ironman Tallin.

Run

The transition from the bike to run went well. (In case you are interested, it was also the only time I visited the toilet during the race.)

The run consisted of four loops of a course between Seaplane Harbor and Old Town Tallinn. On this course, there were many corners and small jumps from the road onto a sidewalk and back down to the road. Initially, this was not a problem, but these became uncomfortable as I became more tired.

Overall, the run started well. I managed to keep my pace a little under my target. The first two laps felt rather easy; my half marathon time was under 2 hours.

When starting the third loop, I remember thinking ‘OK, I can become an Ironman today’. I was certain that I could manage the two remaining loops even if walking was necessary.

The final half marathon – in the rain

Unfortunately, on 3rd loop, the rain became heavier and running started to feel difficult as I started to run out of energy. While my speed reduced, I tried to keep it as constant as possible.

By the fourth and final loop, my legs felt heavy. I was very tired. With the rain coming down harder, I felt pretty cold.

I started to walk through the aid stations in order to drink and eat more. While I had envisioned sprinting the last few kilometers, I did not have it in me. I was happy to just maintain a decent speed.

Throughout the last two loops of the run, I was grateful for my wife and the good number of spectators who continued cheering on the racers even in the rain. The support of these kind people helped a lot.

Running to the red carpet and over the finish line was one of the best feelings ever. Very emotional. Just like that, I no longer felt tired!

Juha Makitalo crossing the finish line of his first full Ironman triathlon at age 50.
“I am an Ironman.” Juha Makitalo

Reflection

What lessons did you learn from your first full Ironman?

Juha – First, I learned the benefit of having a professional coach. The full Ironman is a long distance race and requires a long preparation period. Besides, I was not satisfied just to complete the race; I wanted to finish with a decent time. For this, systematic training with a coach was even more important.

Good training allowed me to complete the full Ironman distance with a pretty good time! On my own, I would never have trained as much as needed. And even if I had, the balance of types of training and of training intensity would have been wrong.

For example, on my own, I would have always run and biked with more or less the same speed. However, Coach Kai’s plan included a mix of intervals and some hard training sessions with others done at a slower pace. The on-line training program included instructions on speed, distance, and/or duration for each.

It helped that I did not start my training from nothing. I managed to complete the race with one year of focused training. But actually, I had been doing a variety of training for over 40 years.

Because of this basic fitness, I could increase the weekly training hours in a rather short period to average over 10 hours per week. I was pleasantly surprised how much my physical condition improved, despite being a bit older.

What changes to your training would you make next time?

Juha – There are two improvements I would make next time.

First, I would practice fueling during training throughout the year. It is not possible to complete an Ironman without frequent energy filling. However, I did not practice enough taking energy gels and bars over the year during normal training.

During the last main practices when I needed to fuel, I noticed it was difficult for me to consume enough energy. It is better to teach your digestive system to use energy gels or bars throughout the year of training.

This is the one area in which I was not well enough prepared.

Related post: Lessons in Ironman Triathlon Racing – Another Senior Triathlete’s Experience

I would also make all equipment changes earlier in the season. I changed some equipment, such as biking shoes and swimming goggles, in the last weeks of training. Adding new equipment shortly before the race made me nervous; I was afraid it might create problems during the race. Luckily, I managed well with the new stuff. However, for sure making these late changes created some extra butterflies.


Any final words for those who want to do their first full Ironman at age 50 or over?

Juha – First, you can do it! I think many of us have had feelings similar to me. We tell ourselves “It is impossible to go through an Ironman race at my age”. It was a big step mentally to register for my first full Ironman race and start systematic training. But, I am happy that I did it.

It is also important to manage the training process. It is not easy to find time for training in addition to normal daily activities. I found it best to plan the week well before.

Also, you need to be gentle on yourself. One missed training session will not kill the plan for the race. On the other hand, you can’t miss training all the time. 

Involve your family

Finally, discuss your race and training plan with your family. Triathlon as a sport takes a lot of time. To avoid unnecessary problems, it is best to agree about the time commitment and targets with your spouse up front.

By the way, I must really thank my wife. For her patience during the time I have spent training and racing. I would typically leave home almost every evening after work for 2 to 3 hours to do the training. She has given tremendous support, being quick to prepare food (I am always hungry during training!), wash clothes, and do many other things.

Thank you Kati!

Acknowledgement

Special thanks to Juha for sharing his story with us, especially given his demanding work schedule.

Leave any questions and comments for Juha in the section below.

Training to Run for Senior Triathletes

If you are among the tens of thousands of beginner or intermediate senior triathletes, this post about training for the run is for you.

Once you have a base level of aerobic fitness, it is time to add higher intensity to gain speed and endurance from your training. This post provides an overview of higher intensity run sessions. It also includes links to books with training plans you can use to prepare for your first or even your hundredth triathlon.

First, the Ground Rules of Run Training for Senior Triathletes

Before adding higher intensity to your training, it is important, even critical, to be aware of some of the key ground rules:

  • Observe the 80:20 rule of aerobic to anaerobic (high intensity) training.
  • Do not run all-out. Before beginning higher intensity sessions, run a 5k. Use your pace for this as the basis for the pace during high intensity portions. Most programs specify a pace for intervals that is below the race pace. A goal of the intervals, or even longer runs, is to use a pace that can be maintained throughout each of the repeats within a set.
  • Avoid increasing distance and speed by more than 10% per week.
  • Pay attention to running form.

More on these later in the post.

Start With Realistic Goals

Injury is the greatest risk when adding higher intensity to your run training. First, you are excited to get into the ‘real’ training. And, if you are like me, you imagine being able to run faster than your body is able.

Why do I say this? Because I have been there more times than I care to admit. Running too fast at this point usually leads to injury, enough to send you back to the start.

The best place to start is by using your last race time. However, if that has been more than a few months in the past, run the distance for which you are training. Use this time as the basis for the next 12 (sprint) to 18 (Ironman 140.6), or more, weeks leading up to a race.

Don’t Forget the Warmup

Every run session begins with 10 to 15 minutes to warm up the muscles. An easy jog will accomplish this. However, the warm-up will be even more effective using one or two of the following1,2:

  • Strides – 80 to 100 yard (meter) runs at a fast but relaxed pace; gradually accelerate over the first three-fourths of the distance and decelerate to the warm-up pace during the rest of the distance.
  • Butt kicks – 20 meters of running on the balls of your feet while trying to lift your feet high enough to kick yourself in the butt. These are often included in the first part of the strides. Butt kicks help with leg turnover speed, hamstring strength, and heel recovery.
  • High knee lifts – These are also often included in the first part of each stride. For this drill, the goal is to lift your knees as high as possible with each step in order to increase leg turnover and strengthen calves and hip flexors.
  • Skip – Combine jogging and skipping for 100 yards (meters) two or three times during the warm-up.

Types of High Intensity Runs

  • Track repeats (or repeats on a relatively flat section of a paved or concrete trail) – these runs include distances of between 400 and 2,000 yards (or meters) followed by short periods of recovery. The distance of the repeat will gradually increase throughout the training program. The goal for these is to increase maximum oxygen consumption (VO2 max) and improve running efficiency, speed, and power.
Graph shows running power (in Watts) and pace (in minutes per mile) that is part of run training for senior triathletes.  The graph shows three repeats of higher power and speed near the end of the run.
Power (in Watts) and pace (in minutes per mile) versus time from a Stryd power meter. Note the three intervals (gold and blue colored spikes) on the right third of the graph.
  • Hill repeats – According to the running power meter manufacturer Stryd, start with 2 x 15 to 20 seconds running up a hill with at least 8% grade (8 feet [meters] rise over 100 feet [meters] distance). Repeat every 7 to 14 days adding two repeats each session to a maximum of 10 per session.

Longer runs

  • Tempo runs – These are runs at a pace considered hard but still comfortable. Tempo runs are designed to increase anaerobic performance and, more specifically, the lactate threshold. The distance of these runs will vary with the distance of the race for which you are training and where in the training plan you are at the time. For example, the distances for tempo runs typically peak at about three-fourths of the way through a plan.
  • Long runs – These are the longest but also the slowest runs. The aim of these is to increase aerobic endurance.
  • Brick runs – These are runs of at least one mile immediately after a bike session. Brick runs train your body to run with good form after having completed the bike leg of a triathlon. Since this transition involves significant changes to body position (from the hunched over, aero or similar position to running), pay extra attention to your running form. An article on Training Peaks highlights typical problems with form when running after biking. It also describes the importance of proper running form in a triathlon using Olympic gold medal triathletes as examples.

Related post: Why Seniors Should Use Interval Training

Typical Run Training Session for Senior Triathletes

A high intensity run training session will consist of the following in order listed:

  • Dynamic warm-up (NO STATIC STRETCHING of cold muscles!) for 10 to 15 minutes by jogging or combining jogging with one or two of the warm-up drills described above.
  • Main set consisting of either repeats, tempo runs, or long runs.
  • Cool down by jogging for 10-15 minutes. Proper cool down provides the benefits of active recovery.
  • Stretching of warmed muscles immediately after completing the cool down portion of the run. This portion should include stretching the hamstring muscles, quadriceps, calf and Achilles tendon, and back.

The references at the end of this post contain detailed training plans for 5k (sprint) to full marathon (Ironman 140.6) distances.

Watch Your Form

Some books on triathlon training provide detailed descriptions of proper running form. These point to proper foot strike, head orientation, elbow angles, stride length, and so on. Kind of intimidating and too much for me to remember when I am running.

That’s why I appreciate that Joe Friel3 boils these down to simply ‘running proud’. You get most of the way if you think about looking proud – head high, standing tall, clearly defined steps, modest stride, etc.

Leave Your Questions and Comments Below

What have you learned to make your run training more effective? What is your favorite high intensity routine and why? Least favorite and why?

References

  1. Linda Cleveland and Kris Swarthout, Train To Tri – sprint and Olympic distances only (paid link)
  2. Bill Pierce, Scott Murr, and Ray Moss, Run Less Run Faster – 5k to full marathon (paid link)
  3. Joe Friel, Triathlete’s Training Bible – 5k to full marathon (paid link)

Affiliate Disclosure

error

Enjoy this post? Please spread the word :)