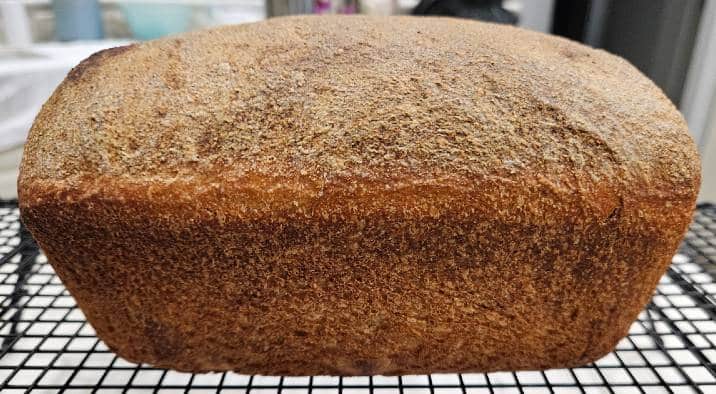
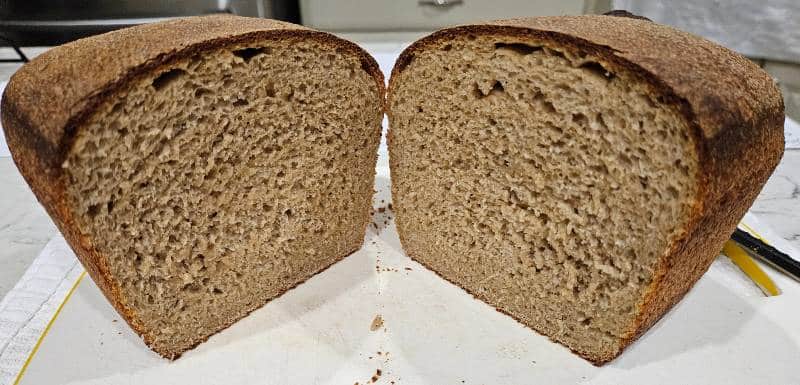
Sprouted Wheat Sourdough Sandwich Bread

Homemade sprouted wheat sourdough bread is a healthy alternative to traditional loaf breads, homemade or from food stores. It is also an economical alternative to commercial sprouted grain breads.
Over the past year, I experimented with sprouted grain breads made with a sourdough starter from a mixture of sprouted wheat or spelt and unsprouted buckwheat flour. Sprouted wheat and spelt have been freeze-dried then ground using a KitchenAid flour mill. Buckwheat has been ground without sprouting.

Here is our favorite sourdough bread recipe.
Step 1: Add the following ingredients to an 8 cup or larger bowl
I use a bowl with one cup graduations to help me follow the rising of the dough in step 6.
- 430 grams of whey from making whole milk Greek yogurt. Use filtered water if you don’t have whey.
- 100 grams of active* sourdough starter
- 10 grams of salt
* active means that the starter was fed within the past day and is bubbly.
Step 2: Whisk the three ingredients to mix the sourdough starter with the liquid.
Step 3: Add 512 grams of sprouted wheat or spelt flour to the liquid mixture from Step 2.
Sprouted grain flour is, from my perspective, expensive. Therefore, I prefer to grind my own sprouted and dried hard winter wheat and spelt. I have dried sprouted grains in an oven (not every oven will work for this), dehydrator, and freeze dryer. Dry the grains at or a little below 113 °F so the enzymes in the grain remain alive.
Step 4: Mix the flour until all the flour is wet by the liquid from Step 1. Let this set for 30 minutes while the flour hydrates.
Mix thoroughly to wet all the flour. Break up lumps of dry flour, again to make certain all the flour is wet.
Step 5: Stretch and fold
With clean dry or gloved hands, grab a hand width of the dough. Pull the dough upward 6 to 12 inches (15 to 30 cm), and fold it over the top of the rest of the dough. Repeat this ‘stretch and fold’ five times. Let the dough rest for 10 minutes. Repeat the five stretch and folds, then let it rest for another 10 minutes. After a third sequence of five stretch and folds, the dough will be ready for the first rise (step 6).
As you begin the stretch and fold process, the dough should be wet and a little sticky. If it is too wet, add a tablespoon of flour to the dough. If some flour is still dry, I wet my hands before the first stretch and fold. The little water that sticks to my hands is enough to wet the flour. By adding ingredients by weight, you almost guarantee that the dough will not need more flour or more water.
Early in the stretch and fold sequence, you should be able to lift the entire lump of dough from the bowl. The dough will be elastic yet strong enough to not tear.
Step 6: Cover the dough and let it rise until it doubles in size
Depending on how active your starter is, the dough will double in size (from about the three cup level to the six cup level in the two quart mixing bowl) in six to eighteen hours. Don’t let it rise much more than this. If you need to control the rate of rising, such as if you want to sleep before the dough has finished rising, put the dough in the refrigerator and take it out in the morning. Cooling the dough reduces the rate of rising.
Step 7: Grease a 1.5 quart (1.4 liter) bread loaf pan
Near the end of the rise time, grease a loaf pan. I like to use butter to cover all surfaces that the dough will be in contact with.
Step 8: Shaping
Put about 2 tablespoons of olive oil over the top of the raised dough and a little on your clean hands. Remove the dough from the bowl, carefully scraping the bowl with your fingers to remove any dough that clings to the bottom and side. Start shaping the dough to fit into your bread pan. While doing this, stretch and fold the dough on each of the long edges (two ‘stretch and fold’ sequences). Finish shaping the loaf to fit into the bread pan and place the dough into the bread pan.
Step 9: Final rise
Let the dough rise until it reaches the top edge of the bread pan.
Step 10: Bake
Bake at 425 °F for 20 minutes followed by 325 °F for 25 minutes.
Step 11: Cool
Remove the loaf from the bread pan and let it cool on a rack for one hour or longer before cutting.
Step 12: Enjoy!

Share Your Questions or Comments
Was anything in these directions unclear? If you made a loaf, how did you like this bread?
Comments: Please note that I review all comments before they are posted. You will be notified by email when your comment is approved. Even if you do not submit a comment, you may subscribe to be notified when a comment is published.
