Four Symptoms of Impatience In Triathlon Training
Triathletes are a motivated, driven group. However, we can often be guilty of impatience when training for a triathlon as we strive to become faster or go longer distances.

Younger athletes can get by with more impatience and carelessness in their triathlon training. However, older athletes are less tolerant to training errors. Recovery from training related injuries is longer. Some injuries may even be career ending.

Patience Is A Virtue Especially in Training

When I hear of patience, I am often reminded of the phrase ‘patience is a virtue’.

There are various thoughts on the origin of this phrase. Some attribute it to the early fifth century poem by Prudentius titled Psychomachia. Others credit William Langford in his 14th century poem Piers Plowman.

Students of the Bible can also make a case for this truth being taught in the Old Testament (BC) and the first century church. Old and New Testament verses, including Proverbs 16:32, Ecclesiastes 7:8-9, Isaiah 30:18, and Galatians 5:22-23, teach that patience is not only good, but a source of blessing.

That ‘patience is a virtue’ is timeless. This idea has been passed down through the ages because it is true, including for triathlon training.

What Does Impatience In Triathlon Training Look Like?

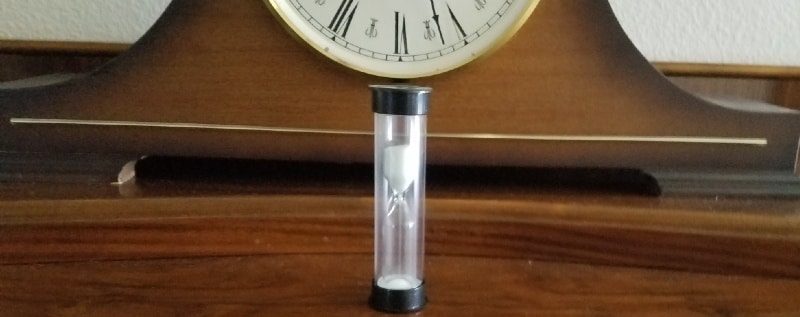
You know the feeling during a game of Taboo when the hourglass timer is running out of sand and your partner is contemplating a clue for the challenge word?

That’s the feeling of impatience. But it has nothing to do with triathlon.

However, the following thoughts, mostly based on experience, do apply to triathlon training. They are examples of how impatience can rear its ugly head in training.

1. Going Too Hard Too Soon

My run training has suffered over the past few winter months. Gyms require masks throughout the visit, something I cannot and will not do while running. On top of this, it’s too cold for me to run outside.

So, when I traveled to a warm climate for a few weeks this winter, I was ready to run.

I have lost count of the number of times I have strained a muscle or been too sore the next day to run. On this trip, however, I pledged to exercise patience.

During the first two weeks, I resisted running too fast, instead sticking to aerobic base building described in a recent post.

Sure enough, I saw the results I had hoped for. After two weeks of aerobic training, I was ready to introduce some intervals and long runs.

Patience is important because the quickest path to injury is to do too much too quickly.

2. Buying the Latest Gadget, Supplement, Or Gear To Make You Faster

Our sport has caught the attention of some brilliant marketers. Many promise that the latest supplement, pair of shoes, bike wheels, or gadget will make us faster.

During the earlier days of my triathlon journey, I succumbed to these messages. I still have some of these items in my closet, which I no longer use.

Of course, we need some basic gear to be competitive. For example, a heart rate monitor has made my training more effective by forcing me to ‘go slow’ while I build aerobic fitness.

Also, swapping my 18-speed Giant hybrid bike, which I used in my first triathlon, for a properly fitted, entry level triathlon specific bike (tri-bike) has made a tremendous difference in my bike times. Most of the improvement from the bike came from the difference in gearing between the two bikes.

After this, I quickly experience the law of diminishing returns. Gear that will help a younger, professional athlete shave seconds from his/her time is unnecessary for me, an amateur triathlete who is solely competing in the sport for fun and as a focus for staying physically fit.

For most of beginner triathletes, spending a week’s wages to shave weight from the bike will have less impact on our bike times than strengthening the relevant muscles or losing a few pounds.

That’s not just my idea. While writing this post, I received an email with a link to a TrainingPeaks article titled You Need a Stronger Body, Not a Better Bike.

The article summed up my sentiments. Most of us will get the greatest gains in performance from increasing our strength and endurance, not from spending on the latest fad or buying more expensive equipment.

3. Not Resting Properly or Enough

In a post on a rest and recovery for senior triathletes, Jim Chapman shared the benefits he has seen from increasing the amount of rest he gets. The patience to listen to your body or, in Jim’s case to his coach, is rewarded in the long run.

Driving ourselves too hard without proper rest can quickly lead to injury or, at a minimum, poorer results from the training.

Rest does not have to mean sitting on the couch watching movies. Cross-training that allows hard-worked muscles to repair can provide rest without sacrificing fitness.

Patience leads to a well recovered, adaptable body.

4. Not Sticking With Your Plan

If you are self-coached, like me, you may relate to this one. There are many free (e.g. library books, blog posts) or inexpensive resources for developing a triathlon training plan.

However, when improvement is slow, there is a tendency to change the plan frequently, even in small ways.

Then, if you are training alone, without a partner or as part of a group, the pressure to tweak the plan can be overwhelming.

There can be legitimate reasons to change a plan, especially if it is not working. However, we don’t want to be the proverbial dog who jumps when he hears the word ‘squirrel’.

Patience gives a solid plan a chance to produce results.

Patience Truly Is A Virtue In Triathlon Training

If you are beginning, patience is vital to improving your performance and gaining confidence while minimizing the risk of injury.

If you are an experienced triathlete, patience is a vital ingredient to training that leads to stronger performance. Patience leads to a strong finish.

Finishing is better than starting. Patience is better than pride.

Ecclesiastes 7:8

How Does Impatience Appear In Your Training?

What have you learned about patience during training?

Are there parts of your training with which you struggle in your training?
 

Better Balance Makes A Stronger Triathlete

Does better balance make for a stronger triathlete? I believe it does.

In the post titled “Triathlon Bike Training When You Can’t Ride Outside” published last month, I wrote about my upcoming skate skiing lesson. Why skate skiing? Because it is great cross-training for the bike leg of triathlon.

I completed the lesson, finishing with a game plan from the instructor for further developing my skate skiing technique. Before the second, solo outing with the skate skis, I watched a few videos with drills for beginners.

The videos reinforced what I had learned during the lesson, that skate skiing requires much better balance than classic cross country skiing. Before moving from the practice area to the course, I must learn to balance while gliding on one ski longer than I am currently able.

How do I improve my balance? That is the question I have been trying to answer and the subject of this post.

If you’re new to triathlon after 50, this guide on how to start triathlon after 50 will help you take the first step.

What is Balance?

According to the non-profit VeDA, “Balance is achieved and maintained by a complex set of sensorimotor control systems that include sensory input from vision (sight), proprioception (touch), and the vestibular system (motion, equilibrium, spatial orientation); integration of that sensory input; and motor output to the eye and body muscles.”

Essentially, balance involves the following three processes:

  1. Signals from inputs (eyes, ears, touch, etc.) travel to and are processed by the brain.
  2. Signals from the brain travel to the muscles required to maintain balance.
  3. These muscles contract as needed to stabilize the body.

For good balance, these processes must occur quickly and efficiently.

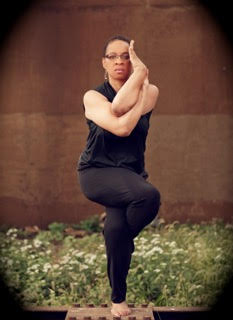
Yoga is one way to develop better balance and become a stronger triathlete.
Yoga is one way to develop better balance. Practicing poses like the one shown produces better balance and makes for a stronger triathlete. Picture from Jessica Perkins.

How Does Age Affect Balance?

Balance tends to decline with age, beginning as early as age 40. According to the USA’s National Institutes of Health, a problem with balance is among the most common reasons older adults seek help from a doctor. 

Poor balance can have many causes. These include disease, loss of eyesight, reaction to medications, changes in the skeletal system, and loss of muscle strength and joint flexibility.

Muscle strength is key to balance for a healthy, active adult. Strong muscles allow the signals from the brain to produce quick response. Conversely, if muscles are weak, they may not be able to provide adequate or fast enough response to maintain balance.

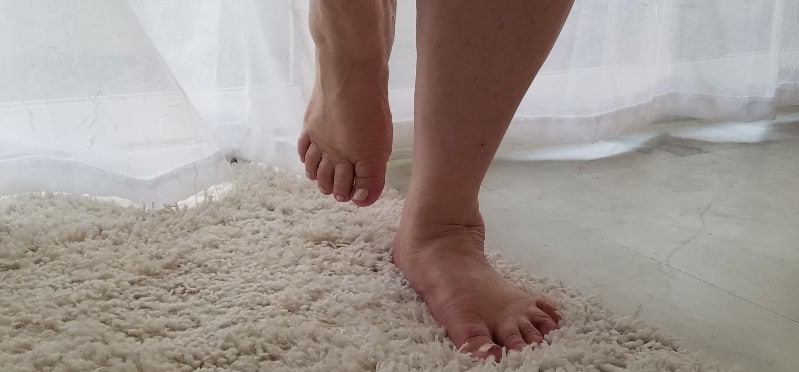
The foot, which can also change with age, is critical to balance. Even a relatively minor change, such as growth of a bunion, has been shown to affect balance.

Posture, which affects one’s center of gravity, often becomes poorer with age through loss of core muscle strength. If our body’s center of gravity is not directly over the support position, we are not balanced. With poor posture, we are less stable and more likely to fall.

How Can Balance Be Improved?

Assuming no other medical conditions, balance is primarily related to the neuromuscular system. Therefore, the current training program can be modified to (1) strengthen any overlooked muscles that affect balance and (2) train the nervous system.

Sensory systems

According to an article on the NESTA (National Exercise & Sports Trainers Association) website, adaptation of the nervous system occurs more quickly than does building of muscle mass. Early in a strength training program, the ability to lift greater weight is due more to adaptation of the nervous system than to increase in muscle mass.

The Law of Facilitation is in play when a signal from the brain to a muscle or set of muscles passes through a given pathway, excluding other paths. As the movement is repeated, the resistance in the ideal path becomes progressively smaller with the number of repetitions. The body continues to adapt and respond more efficiently until the movement becomes automatic.

Through this process of adaptation, we are creating what is often called ‘muscle memory‘. Through practice, even complex movements are made with little or no conscious effort.

Muscle strength

Several posts, including Six Principles of Triathlon Training for Seniors, document that the rate of muscle loss increases with age. Our goal is to reduce the rate of muscle loss. As noted earlier, one component of a program to improve balance is to strengthen the muscles affecting balance.

While the focus of most strength training for triathlon is the larger muscles (gluteus maximus, hamstring, quadriceps), smaller muscles (gluteus medius, soleus) are often ignored and lose strength without us realizing it.

Since these smaller muscles are important for stabilizing the hip and knee when standing on one leg, they are important for balance and, therefore, skate skiing and ice skating as well as biking and running.

Posture

My wife is a stickler for good posture. After many years of ignoring her comments about my posture, I now encourage her to point out when I am slouching or not sitting tall. She relishes the assignment and is quite good at it.

If you’re already training, this guide on how to improve triathlon performance after 50 will help you take the next step.

Exercises To Develop Better Balance and Become a Stronger Triathlete

Through a ski instructor, physical therapist, and several websites, I have developed a routine that I expect will lead to better balance for skate skiing.

The following series of exercises is performed three days per week. They are add-ons to regular strength training, which includes a series of five core strengthening exercises and a new exercise targeting the gluteus medius.

Single leg balance

Skitrax has produced a video demonstrating three ‘dry land’ drills for improving balance. The video shows these drills; I have added the duration for each set.

  • Single leg stand – stand on one leg with the knee bent slightly and the other leg off the ground and stationary. Hold for one minute on each leg. Once this becomes too easy with your eyes fixed on a point in the distance, try it with your eyes open but looking to your right or left. Then try it with your eyes closed.
  • Single leg swing – stand on one leg with the knee bent slightly and the other leg swinging forward and backward. Move your arms in combination with your leg. Repeat one minute on each leg.
  • Single leg dip – stand on one leg with the other out to the side, then bend the knee of the leg on which you are balancing to dip down and return to standing upright with your knee bent slightly. Repeat for one minute on each leg for 10-15 repetitions.
  • Single leg hop scotch – hop on one leg, landing inside an array of five real or imaginary rings and return backward to the start. Switch legs and repeat. Maintain standing balance at the end of each repetition.

Expect these to become easier as your body adapts to the position and the stabilizing muscles become stronger.

Single leg forward jump and hold

To even more closely mimic the movements in skate skiing than those of the single leg hop scotch, Peter from McBike & Sport suggests hopping forward and out onto one foot and holding this position for one to two seconds to simulate maintaining balance during the glide. Repeat the sequence on the other foot for one repetition. I am working up to repeating this 50 times for each foot.

Check-out the video demonstration of this drill.

Better Balance Makes A Stronger, Less Injury Prone Runner

This project started out as an effort to find a better, more enjoyable way of training for the bike leg during the winter without sitting on a trainer or moving to a warmer climate or buying a fat tire bike.

What I have learned is that better balance will also help in the run leg. Running is effectively a matter of jumping onto one leg and balancing on it for a short time then repeating this on the other leg. Good balance of each leg minimizes fatigue and injury from running.

Essentially, running is a series of single leg squat jumps, occurring quickly and repetitively. 

The Importance of Single Leg Balance

Want to take the next step? Choose your path below.

Whether you’re just getting started or looking to improve, here are your next steps:

New to Triathlon?

Start with a step-by-step guide to triathlon after 50 designed specifically for older athletes.

Start Here →

Already Training?

Learn how to train smarter, recover better, and improve performance after 50.

Improve Performance →

Developing Better Balance

Over the next several weeks, I will be working to improve balance so that I can get back out on the snow with better skate skiing form. I will keep you posted on what I learn.

Meanwhile, please share your thoughts on the exercises I have added to my routine.

Also, I would love to hear what you have done or are currently doing to maintain or improve your balance.

Share your comments below.

Comments: We’d love to hear about your experience. Join the conversation below. All comments are reviewed before they appear.

Reply notifications: Click the bell icon above Post Comment to be notified when someone replies to your comment.

Follow the discussion: Click Subscribe above the comment box and enter your email address to receive notifications whenever a new comment is added—even if you don’t leave a comment. After subscribing, check your email and click Confirm to activate notifications.

Triathlon Bike Training When You Can’t Ride Outside

How does training for the bike leg of triathlon occur when you can’t ride outside? There are more opportunities than you might imagine.

It’s Getting Cold Outside

I woke this morning to an outside temperature of 11°F (-12°C) and new snow. On top of this, the fitness centers are closed because of COVID-19 restrictions.

I don’t have, nor do I intend to purchase, a fat tire bike for riding in the snow.

Fat tire bikes with studded tires are preferred for a winter triathlon.

So, how can I maintain fitness for the bike leg of triathlons in which I hope to compete next spring?

There are plenty of options. While these may not be as good as going to a warm climate where I can ride outside, they still take away any excuses.

In this post, I will highlight the training I intend to use over the next several months to prepare for my next races.

Bike Trainer

The most common way of developing bike fitness without riding outside is to use a trainer. In most cases, you connect your road bike or triathlon bike to one of many styles of trainer.

One benefit of using a trainer is that you develop and maintain a familiarity with the bike you will use for your next triathlon.

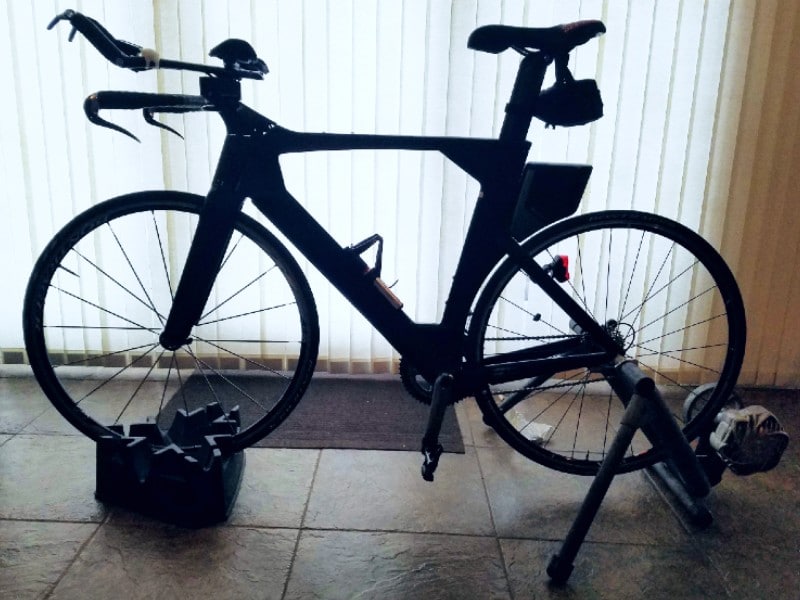
Trek SpeedConcept triathlon bike connected to a Saris CycleOps Fluid2 trainer for bike training when I can't ride on roads or trails.
Trek SpeedConcept on a Saris CycleOps Fluid2 trainer.

When the fitness centers re-open, I will also use their stationary bikes both for individual sessions and classes. I prefer the latter.

My trainer session, usually one hour, is divided into a few periods. Each segment is designed to work on a different goal. Breaking up the session also helps to prevent boredom. (Trainer sessions are also a great time to catchup on one of my favorite podcasts.)

A common one hour trainer session involves:

  • Warm up – 10 minutes at a moderate pace, 80-90 rpm cadence.
  • Single leg drill – 5 repetitions of 1 minute per leg at 80-90 rpm cadence – 10 minutes total. (NOTE: This may not be advisable for some trainers, but is for the Saris CycleOps Fluid2.)
  • Intervals – 5 repetitions of 4 minutes in the highest gear in which I can maintain 60 rpm cadence followed by 2 minutes easy at 80-90 rpm cadence – 30 minutes total.
  • Cool down – 10 minutes at moderate pace, 80-90 rpm cadence.

You can find many workouts to match your current fitness level and specific goals on-line or in books like “The Big Book of Bicycling” by Emily Furia and the Editors of Bicycling.

Advantages

  • Safer than riding in traffic or in the aero position on winding trails shared with pedestrians, especially in the winter but really any time of the year.
  • Efficient – A rule of thumb is that one hour on a trainer represents two hours riding on the road because you aren’t (or shouldn’t be) coasting on the trainer.
  • Some training, such as single leg drills, are best done on a trainer.
  • Accessible within your house or apartment.

Disadvantages

  • Static trainers don’t help to develop stability and coordination or bike handling skills.
  • Can be terribly boring. Some call these sessions the ‘purgatory’ of bike training.

Strength and Endurance Exercises

Strength training throughout the year should be a regular part of a triathlete’s training. I recommend Mark Allen’s program, especially if your fitness center is open.

However, if it isn’t or you want to give extra attention to strength training for the bike leg, look at the TrainingPeaks routine.

Except for the row, the exercises that involve weights can be done with homemade alternatives such as a weighted backpack (kettlebell) and plastic jugs filled with water (8 pounds per gallon/1 kilogram per liter) or other materials (beans, sand, coins) depending on the desired weight.

Advantages

  • Allows you to focus on strengthening the weakest areas for the greatest improvement.
  • Can be done from the convenience of home or at a fitness center.

Disadvantages

  • The only disadvantage of which I am aware is that doing exercises without the benefit of a coach or training partner can lead to less than optimal results because of poor form.

Cross-Country Skiing

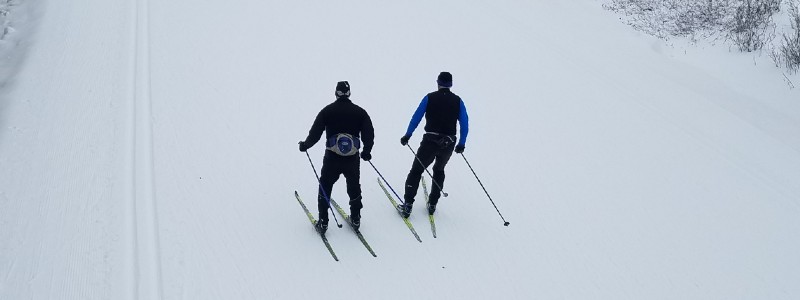
cross-country skiing is effective cross training for cycling
Cross-country skiing is a great way to cross train for cycling while enjoying fresh air and sun. It also helps prepare for a winter triathlon involving running, biking, and skiing.

In the northern USA state where I live, Nordic skiing, or cross-country skiing, and ice skating are popular winter sports. I enjoy both skiing and skating, though have not skied for over 20 years.

Nearly every county park in our area has groomed cross-country ski trails. Larger parks also rent ski equipment (skis, boots, and poles) and offer group and personalized instruction.

Cross-country skiing produces endurance and strength for both the large muscles and the smaller muscles that support the larger muscles. Brett Sutton, coach of world champion triathletes, calls cross-country skiing “the hardest overall body workout out there”.

Downhill skiing is also good for building lower body and core muscle strength and for improving balance and coordination. However, downhill skiing does not yield the endurance benefits of cross-country skiing. Also, it much less accessible and more expensive than cross-country skiing.

“Nordic skiing, or cross-country skiing, is also great cross training for cycling. While downhill skiing brings more strength gains than endurance, Nordic skiing brings more endurance gains along with the added development of supporting muscles.”

ILoveBicycling.com

Classical vs. Skate Skiing

Today, there are two types of cross-country skiing – classical and skate-skiing.

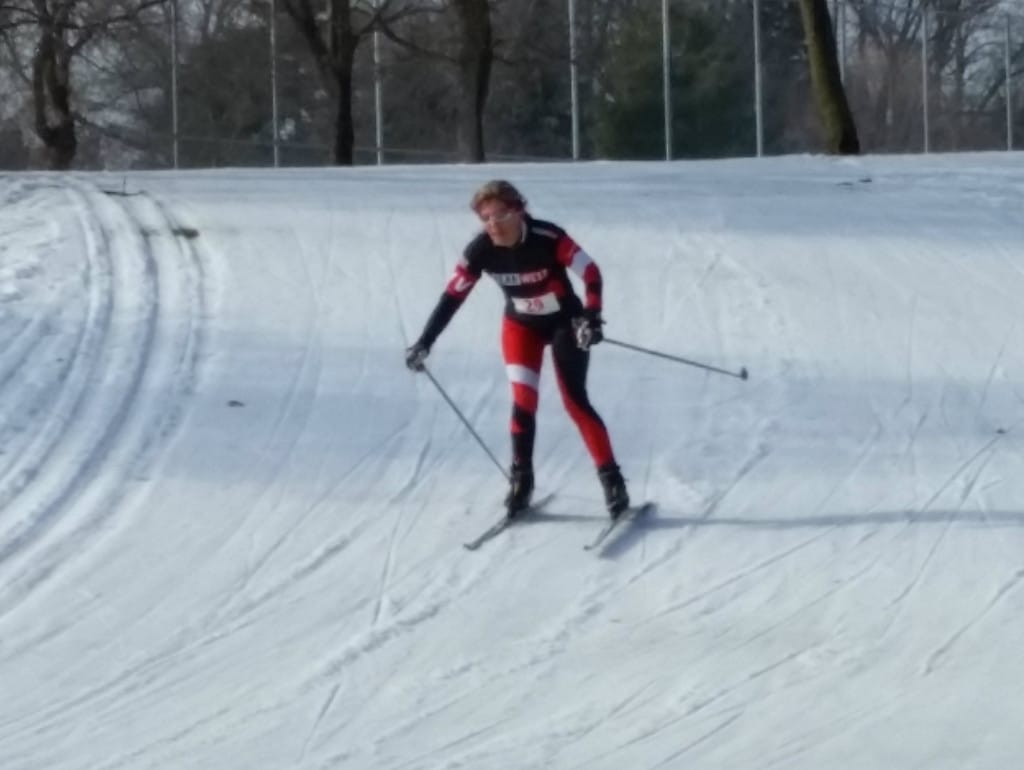
Classical cross-country skiing involves a kick and glide motion. Skis remain parallel to each other, unless ‘snow plowing’. The classical cross-country ski courses are characterized by the parallel ruts in which the skis glide.

Cross-country skiing can also be done on fresh snow, that is, without a groomed trail. Most snow covered walking or bike paths are a candidate for classical skiing.

In contrast, the side-to-side motion in skate-skiing is like that of ice skating. Therefore, it uses muscles even more similar to those for pedaling.

One disadvantage of skate-skiing is that it requires a groomed trail. This makes it less flexible in where it can be done. Skate-skiing is also more difficult because it requires greater balance and coordination. However, it is faster than classical skiing.

Advantages

  • Provides both endurance and strength benefits.
  • Accessible – classical cross-country skiing can be done at your nearest park, golf course, or snow-covered lake. (Be sure the golf course is open for skiing and the ice on the lake is thick enough.)
  • Relatively inexpensive, especially compared to downhill skiing.
  • Gets you outside, into the fresh air and, hopefully, the sun. Think Vitamin D.

Disadvantages

  • While cross-country skiing uses many of the same muscle groups as cycling, you may put more strain on certain muscles and tendons than when biking. To avoid injury, start slow and increase distance gradually.
  • A beginning skier is likely to fall. Expect it and try to relax as you fall to avoid significant injury.

Note

From the reading I did in preparing this post, I have taken the first steps in scheduling cross-country ski lessons at a nearby county park. I am hoping to learn to skate-ski.

Ice Skating

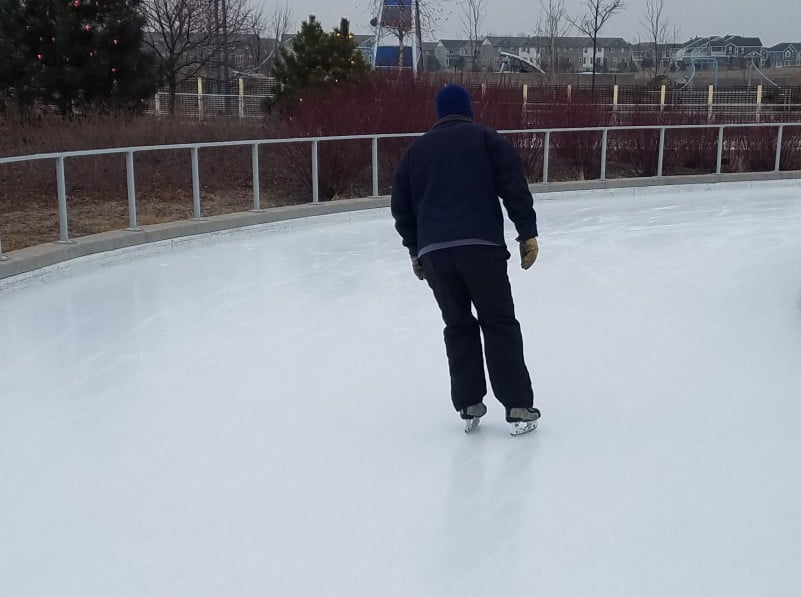
Most cities in the northern climates, large or small, have an outdoor ice skating rink. Elsewhere, given the popularity of ice hockey, many of the more populated areas in the USA and Canada have indoor ice arenas.

Ice skating, like skate-skiing, is great for working smaller muscles that are often overlooked but valuable for biking performance. It is also great for improving balance, flexibility, and coordination.

Ice skating is an effective way to strengthen small muscles often overlooked in strength training yet important for cycling performance.

Advantages

  • Great for strengthening leg and abdominal muscles. Skating is also reported to increase the flexibility of more joints than cycling and running by strengthening ligaments and connective tissue around these.
  • Low impact, unless you jump or spin (or fall often).
  • Relatively inexpensive, often free (after purchasing or renting skates) if you live in a climate where outside temperatures are consistently below freezing. Even small towns typically have an outdoor ice skating rink open to the public.
  • Gets you outside, into the fresh air.

Disadvantages

  • Ice skating requires good ankle strength (which you probably have as a runner). However, you may put more strain on some muscles and tendons of the feet and ankles than when biking. As with any new sport, start slowly and increase gradually.
  • Expect to fall, especially as you begin. At least that’s my experience. However, since I am usually bundled up for the cold, I have seldom been injured and then only with a bump or bruise to my ego.

No Excuses!

None of us has an excuse related to weather for not continuing to train for the bike leg of a triathlon throughout the winter. Even if I stay in the north part of the USA, there are plenty of opportunities inside and outside my house.

Some may actually be better than riding outside.

How Do You Train for Triathlon Biking When You Can’t Ride Outside?

How do you continue training for the bike when you cannot ride outside? Share your comments below.

Learning to Swim for Triathlon – Breathing Correctly

‘Breathing correctly while swimming is a pre-requisite for a relaxed and efficient swim stroke. It’s also the foundation of a confident triathlon swimmer.

Learning to Swim for Triathlon

Since I learned to swim around the time I began grade school, I was initially surprised to hear about the many over 50 who have never learned to swim. However, it is truly never too late to learn to swim. In fact, you should learn to swim for all its benefits.

Most who struggle with learning to swim, including my mother and my aunt, swear they were simply not ‘made’ to swim. When pressed on this, they admitted their difficulty learning to swim was rooted in their inability to ‘catch’ their breath.

The literature on swim training is full of support for the premise that breathing correctly during the swim is the first and most fundamental skill to master on the road to becoming a confident swimmer. It is only after we have developed a means of taking in oxygen needed to fuel our muscles during swimming that we can work on other parts of the technique.

The confidence that comes from relaxed breathing during the swim will also help us deal more effectively with the unknowns that can and often do occur during a triathlon.

Why Breathing While Swimming is Challenging?

The swim strokes commonly used in a triathlon require breathing with our face in the water a majority of the time. This is certainly true of the fastest and most popular stroke for the triathlon swim, the front crawl, sometimes referred to as freestyle.

For this stroke, our face, nose, and mouth will be in the water during most of the stroke. This is especially true if we maintain a proper body position. With a correct position, our head will be in line with our spine in order to maintain balance in the stroke.

Even the breaststroke, used by some triathletes, involves the face being underwater a good deal of the time.

While it is possible to swim with our head out of the water, at least for shorter swims, this body position leads to extra drag as our legs drop in the water. It can also lead to fatigue of the neck muscles. Greater fatigue during the swim will affect the other legs of the triathlon.

Controlled Breathing Starts With Base Fitness

The more relaxed our breathing is during the swim, the more we can focus on the stroke and on maintaining control of body position in the water.

There are two principal contributors to controlled breathing: (1) fitness and (2) breathing technique in the water.

Let me start with the first one – fitness.

We all know that when starting to exercise after being away from it for a while, our breathing becomes labored and our heart rate becomes elevated more quickly than when our fitness increases. Our bodies are not as efficient in using oxygen as they will be when we become more fit.

It is well documented that the amount of power we generate at a given heart rate increases as we become more fit.

My own experience has been that when I resume swimming after a period of low activity (low aerobic fitness), my heart rate will often spike when I push myself to swim faster.

When that happens, I am forced to slow or even stop momentarily. This doesn’t give me confidence as a swimmer.

For this reason, I suggest that before starting to swim, you develop a base level of fitness through combined walking and running or other aerobic exercise, such as water aerobics, using the approach described in this post on building a base level of fitness.

What Makes for Proper Breathing During the Swim

We rarely pay attention to our breathing when we are on land. We may be more aware of our breathing when running, biking, or performing other strenuous activities. However, even if conscious of our breathing, we notice it is a more or less continuous process. We are continually either inhaling or exhaling.

Why then do people hold their breath while swimming, expecting to almost instantaneously exhale and inhale? It doesn’t work. And breathing incorrectly becomes even more apparent as we swim for a short while and our body’s demand for oxygen ramps up.

When learning to swim, breathing must be conscious. It must involve proper amounts of inhaling and exhaling. The challenge is that the ratio of inhaling and exhaling is not natural. Neither is the environment. That’s why we need to learn to breathe in the water and to do so with ease.

For the rest of this post, I will assume that you will learn to swim using the forward crawl stroke, the one most commonly used for the triathlon swim.

Inhale quickly through the mouth

Inhaling during the swim stroke occupies a small portion of the breath. Tilting our head to one side periodically so that our mouth is out of the water gives us time to take a quick breath of air. Even if a little water gets into our mouth during this process, it is not a problem since our mouths are designed for taking in water as well as air.

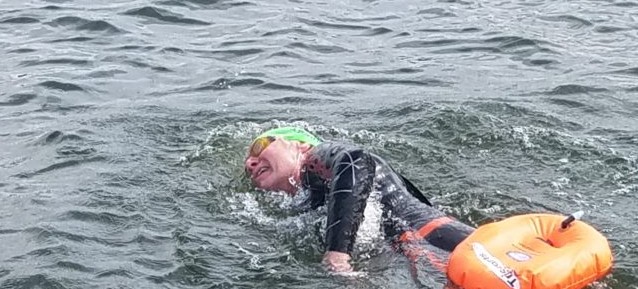
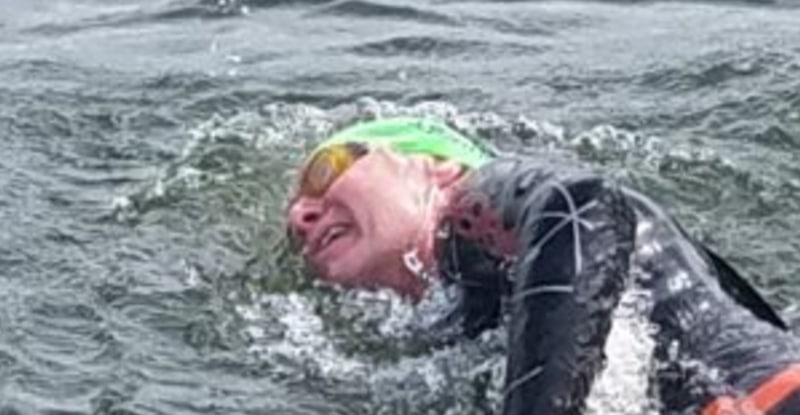
inhaling during a front crawl
Inhaling during the front crawl stroke occurs as the head rotates to one side, yet remains partly underwater. Note the wave in front of the head and the depression near the mouth.

Exhale through the mouth and nose until ready to inhale once again

Exhaling is where most of the difficulty occurs. Unless you have exhaled all or nearly all the contents of your lungs, the amount of oxygen you can take in when inhaling will be limited. For this reason, exhaling through both the mouth and nose should begin immediately upon completing the inhale portion. Continue exhaling until beginning to inhale once again.

Remember to exhale through both the mouth AND nose. Most of the exhaled air should, however, pass through the mouth.

Exhaling through the nose alone has two limitations. First, it is nearly impossible to exhale an adequate amount of carbon-dioxide rich air during the short period of a single stroke.

Secondly, forcing as much air out of the nose as possible forces germ-laden water droplets from the throat into the nasal passage and other portions of the sinuses and ears. Water trapped in these parts of the body can be irritating, even unhealthy.

Triathlon Tip: Do you struggle with water in your nose during swimming? According to USAT officials, it is legal to use nose plugs and even a face mask during a triathlon swim. For more information, check out this related post: Product Review: Nose Clip for Triathlon Swim Training.

Never hold your breath

If you are having difficulty breathing while learning to swim, stop and observe. Is there any time in the stroke during which you hold your breath? Never hold your breath! Always be either inhaling (while your mouth is out of the water) or exhaling.

Learning to Breathe Correctly While Swimming

I hope that I have convinced every new swimmer preparing for a triathlon to begin their swim training by learning to breathe properly.

At this stage, it is critical that you keep yourself safe by avoiding water too deep to stand in. With this ‘safety first’ goal in mind, here are two options for developing your breathing technique.

On Your Own – With a Friend Who Can Swim

While getting lessons from a professional swimming instructor is best, you may not have access to one because of where you live. Or, your fitness or community center may not offer lessons.

You can develop confidence in breathing during the swim on your own. However, at this stage in your swimming development, don’t go into the pool without an observer (lifeguard or friend who remains on the deck watching you).

First, practice breathing while standing in the water. Put on your swimming goggles (and nose and earplugs if needed). Put your face in the water and exhale simultaneously through your mouth and, if not using a nose plug, your nose.

When you have exhaled nearly all the air, roll your head to one side until your mouth is just out of the water. Quickly take a breath, roll your head back into the water, and begin exhaling. Repeat this process several times.

For this exercise, you can rotate to the side on which you are most comfortable. However, after a while, you will want to become comfortable breathing on either side. You will understand later, especially during an open water swim on a sunny or windy day, why this additional flexibility in your swim stroke is valuable.

Note that breathing while moving through the water will be easier than when standing still. As the picture above shows, water flows around the body as we move through it, creating a depression around our face. As a result, you can take a breath with one eye (goggle) underwater.

Next, grab a kickboard

Once comfortable with the rhythm while standing, you can grab a kickboard. Hold it with your arms extended in front of you. Extend your body in the water while maintaining a straight spine. Keep your butt, legs, and feet near the top of the water.

Kick along the length of the pool practicing breathing – inhaling and exhaling. Continue to exhale until your mouth is out of the water enough to grab a quick breath.

Try to avoid lifting your head when rotating it to take a breath. Be aware that the kickboard will keep your arms and head higher in the water than when swimming without it.

Once you are comfortable kicking and breathing, you can hold the kickboard with one hand, alternating hands as you use the other to pull through the water.

These techniques are demonstrated in this video.

Join an Adult Swim Class at the YMCA or Your Fitness or Community Center

I learned to swim well when I was young. However, the quality of my swim stroke and my confidence as a swimmer jumped to a new level through the help of one of my kid’s YMCA swim coaches. He had watched me swimming laps and gave me a couple of pointers related to breathing that I have included above. These simple tweaks to my breathing changed my swim.

Safety First – Save the Open Water for Later

There are several advantages of starting to swim in a pool.

First, and probably most important, is that you can control the depth of water you are in. Many pools have a depth in which you can safely stand. If there are deeper sections, it is easy to see where the depth increases to avoid these.

Many pools also have lane dividers, ropes with or without discs, running between individual lanes. You can hold on to these if it becomes necessary to stop in an area too deep for standing.

These favorable conditions do not typically exist in open water. In most cases, it will be difficult to see the bottom and gauge the depth of the open water.

Related post: Triathlon Swim–How Does a Pool Swim Differ from Open Water?

Where Do You Go From Here in Learning to Swim for Triathlon?

As with learning most new skills, patience is a virtue. Keep working to become comfortable breathing with your face in the water.

Once you have achieved this, you are ready to move on. In the next phase, you will develop your form in each of the parts of the stroke. This will set the stage for more effective training and further confidence-building increases in speed and distance.

Leave Your Questions and Comments Below

Leave your questions about breathing while swimming in the Comments below. To the experienced swimmers and swim coaches reading this post, what would you add to my comments?

Comments: We’d love to hear about your experience. Join the conversation below. All comments are reviewed before they appear.

Reply notifications: Click the bell icon above Post Comment to be notified when someone replies to your comment.

Follow the discussion: Click Subscribe above the comment box and enter your email address to receive notifications whenever a new comment is added—even if you don’t leave a comment. After subscribing, check your email and click Confirm to activate notifications.

error

Enjoy this post? Please spread the word :)